General
How to create a sticky menu in WordPress
A visually pleasing and functional website is what every organization that wants to boost its internet traffic should strive for! One of the most important things on one website is the navigation bar or menu as the majority of important content is located there. It consists of several sections such as About Us, Products, Services, Contact, and similar items, and as such represents the first thing a visitor reaches when opening your website.
Menus can be located both horizontally on top of the page or vertically on the left side. Because of its great visibility and accessibility, a horizontal menu is more widely used, and, when properly designed, it can have a great impact on increasing your traffic.
Now when most people use their mobile phones when visiting websites, a navigation menu on a properly designed website should be perfectly adjusted for these devices, as well! Your valuable SEO ranking can’t be good enough when you don’t have a mobile-friendly website, and that is a good enough reason for you to pay attention to this detail. Good mobile navigation makes it simple for visitors to find what they need without having to waste time scrolling up and down or adjusting the screen. The navigation menu on mobile devices, as on desktop computers, should be easily visible and reachable.
That’s why in this article we are going to introduce you to WP Sticky, a simple-to-use plugin that will fix all your problems regarding navigation menus and their reachability! WP Sticky is a great piece of software that will make all of your page elements persistent, in this case, the navigation menu! It is extremely simple to use, even for individuals with no coding knowledge! It is also very simple to navigate and play with, and it works with any WordPress theme, builder, and other plugins, as well. Besides a sticky menu, you can make headers, widgets, logos, CTA buttons, or floating menus sticky.
It comes in both free and PRO versions with each one having its benefits.
Free Version
As we said, both versions have their benefits. With the free version, you can choose one element and simply add it to the plugin, and the plugin will do the rest!

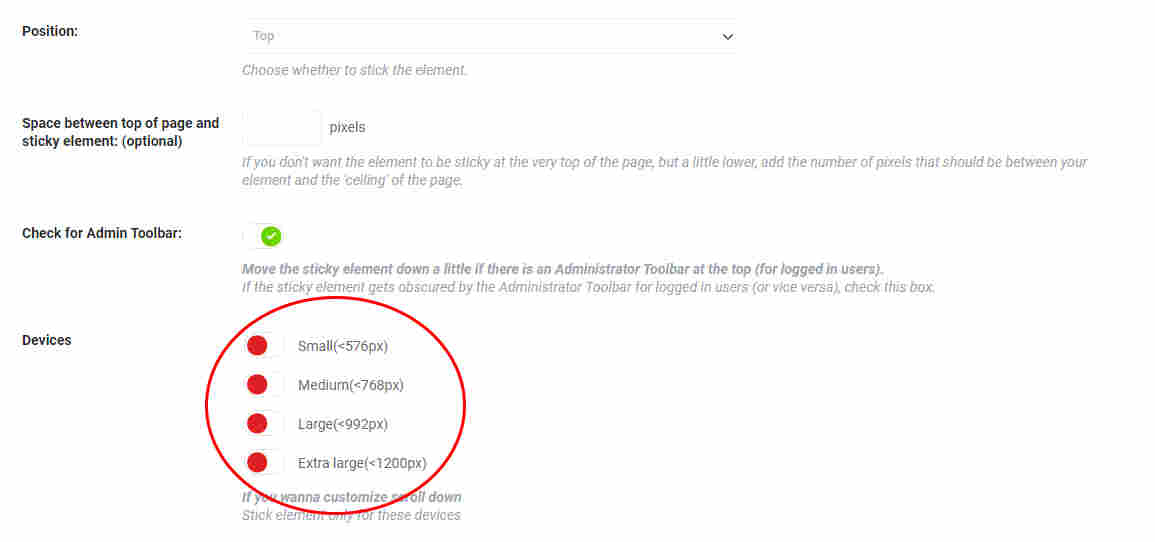
As shown in the image above, in the plugin’s settings in the WordPress dashboard, you choose the element you want the plugin to treat, set the pixel ratio of space between the top of the page and the element, and you can tell the plugin to make exemption when the screen is smaller/larger than the dimension you enter. This way the plugin will not implement the sticky option to the element you chose in the first step.
To choose the free WP Sticky version, click here.
PRO Version
Besides all the additional benefits the PRO version gives you, it also provides you with an easier way to stick to any element! With those features, the plugin allows those who do not have any coding knowledge to successfully use the plugin. You can add as many sticky items as you need and configure them separately.
Visual Picker feature is the most special one as it allows you to open the page in it and simply drag the mouse over to choose the element, in this case, the navigation menu, and make it sticky!
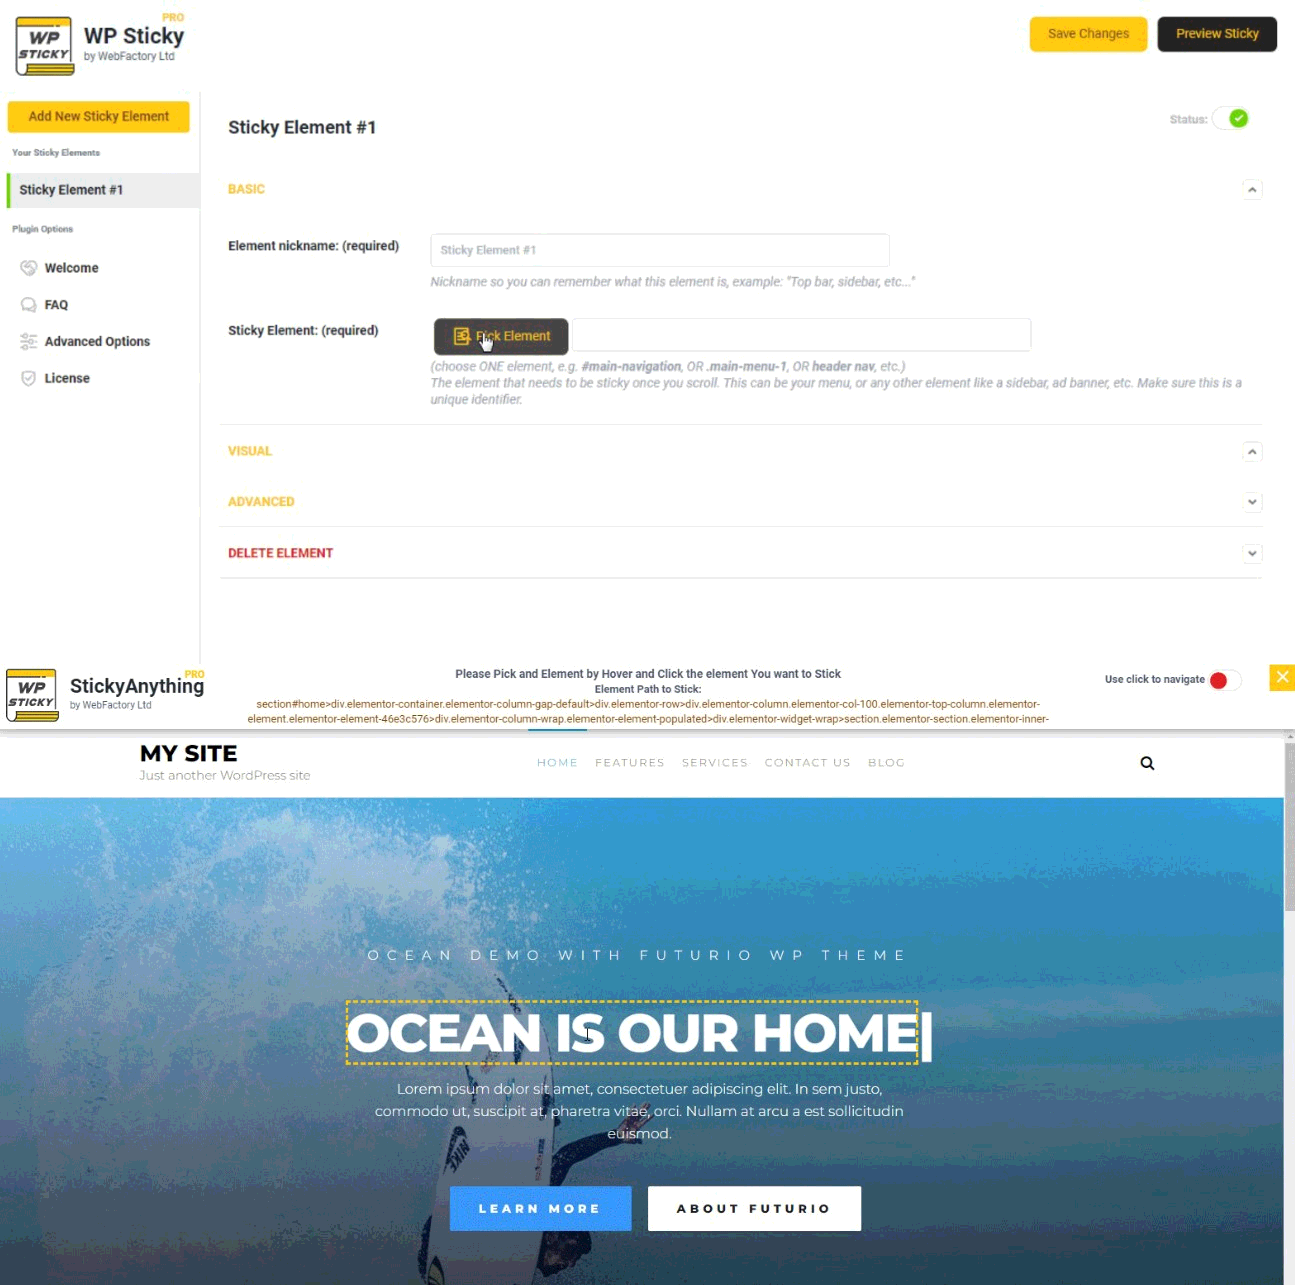
You tap the button to pick the element, Second picture: You choose the element by dragging the mouse over it (yellow rectangular frame)
An example of how WP Sticky works can be seen on its website (picture above). No matter how long you scroll down it, the navigation menu will always follow you.
Another noteworthy feature of the PRO version is Multiple Sticky Elements which allows you to make multiple elements sticky. For instance, you can choose a widget, CTA button, and some banner in combination with a navigation bar to be persistent on the page. Furthermore, if you want elements to be sticky on particular pages rather than the entire website, the PRO version allows you to specify which posts, pages, categories, tags, and CPTs you do and don’t want the element to be sticky on.
To choose the PRO version, click here.
Additional Features and Options
In the Visual panel, you can modify the plugin’s functionality, such as the slide-down effects (Fade-in and Slide down effects), the devices on which the plugin should implement the settings (small, medium, big, and extra-large), the opacity to make the element less or more transparent, scroll range where you can set the exact part of the page where the element will become sticky, and Background color when sticky which works perfectly if the navigation bar colors match with some parts of your page. Then you simply pick the color and assign it to your element.
Push-Up Element enables you to select an element that activates your sticky one and pushes it back to its original location. Your sticky menu will remain sticky regardless of how far down the page the user scrolls.
Do Not Stick Here instructs the plugin to simply utilize the basic settings; your sticky element will act the same regardless of the post or page the users are on. You can use this feature to specify which pages should not have the sticky element (for example About Us or Products pages).
Any sticky element can be disabled and reactivated within the plugin, but if you want to entirely erase the element, click the “Delete” button, confirm it, and it’s away. This can be done with the Delete Element feature.
Final Words
WP Sticky represents the perfect plugin that comes both with features and simplicity to use so if you are looking for a solution this one offers, our recommendation surely would be this one!